YARN package manager is a tool for managing yarn. The acronym stands for “Yet Another Resource Negotiator”, and that is what the package manager does: it negotiates with other packages to determine which will consume resources and when without user intervention. The design of this system was inspired by Node’s npm and Python’s pip, but it is much more sophisticated.
The YARN package manager implements the Resource Negotiation API (RNAPI). In this sense, the design is based on Node.js and Python’s pip/setuptools, but with a greater emphasis on automation. Using RNAPI makes it possible to automate common resource management tasks like deciding which packages will use external resources and when. In some cases, the system can even automatically determine which packages depend on each other for their dependencies without human intervention.
This guide will walk you through installing Yarn on the Debian Linux distribution.
Here, we’re assuming that all you’re after is a package manager to manage your project dependencies, and that you don’t need a fancy GUI. This demo will be working from a Debian 10 or Debian 11 system on the x86_64 architecture. If you’re on another platform (e.g. MacOS or Linux), the instructions should still work, but some details may vary slightly.
Prerequisites
To complete this tutorial, you will need:
- A Debian server with at least 2 GB of RAM that has access to the internet to download Yarn packages.
Updating Your Debian Server
Before you start, updating your Debian system by running the following command is always a good idea.
sudo apt update && sudo apt upgrade -y
Sample output:

Installing Yarn Package Manager
There are ways to install Yarn on Debian. You can either install it from the official repositories or you can compile it from the source. The easiest way to install it is from the official repositories. But the version that ships with Debian isn’t recent enough for this tutorial.
We will install Yarn using a third-party package repository that contains a newer version. This demo uses the repository from its developer.
Run the curl command below to add the GPG key to your APT.The GNU Privacy Guard(GPG), or GnuPG, is a complete and free implementation of the OpenPGP standard commonly used for encrypting and signing data and communication.
We add the GPG key so that your APT system can verify the integrity of the packages downloaded from the Yarn repository.
curl -sS https://dl.yarnpkg.com/debian/pubkey.gpg | sudo apt-key add -
You will get an OK response from your system, as shown below. The OK response indicates that the Yarn GPG key has been added to your APT system. You can continue to the next step of installing Yarn.

Run the echo command below to add the Yarn repository to system.
- The echo is a command that is used to display text on the screen. It can take several options.
- The deb is a package format. APT uses it as an archive format for software packages, the equivalent of an installation floppy/CD/DVD.
- https://dl.yarnpkg.com/debian/ stable main" is the address of the repository in APT’s syntax.
- The | pipe is a UNIX shell operator that can take the output from one command and use it as input for another. It is used here to combine the output of the add command and the input of the tee command.
- tee is a command for simultaneously writing to a file and to the screen.
- /etc/apt/sources.list.d/yarn .list is the path of the file in which we add the repository.
Sample output:

Rerun the apt update command to synchronize Debian’s package index files from the newly added repositories.
sudo apt update -y
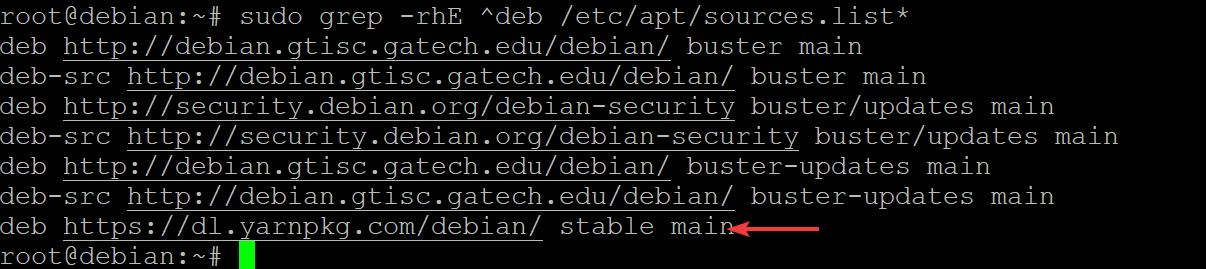
Run the grep command below to verify if the yarn repositories listed out in the output, as shown below.
sudo grep -rhE ^deb /etc/apt/sources.list*
You will see the yarn repositories in the output, as shown below.
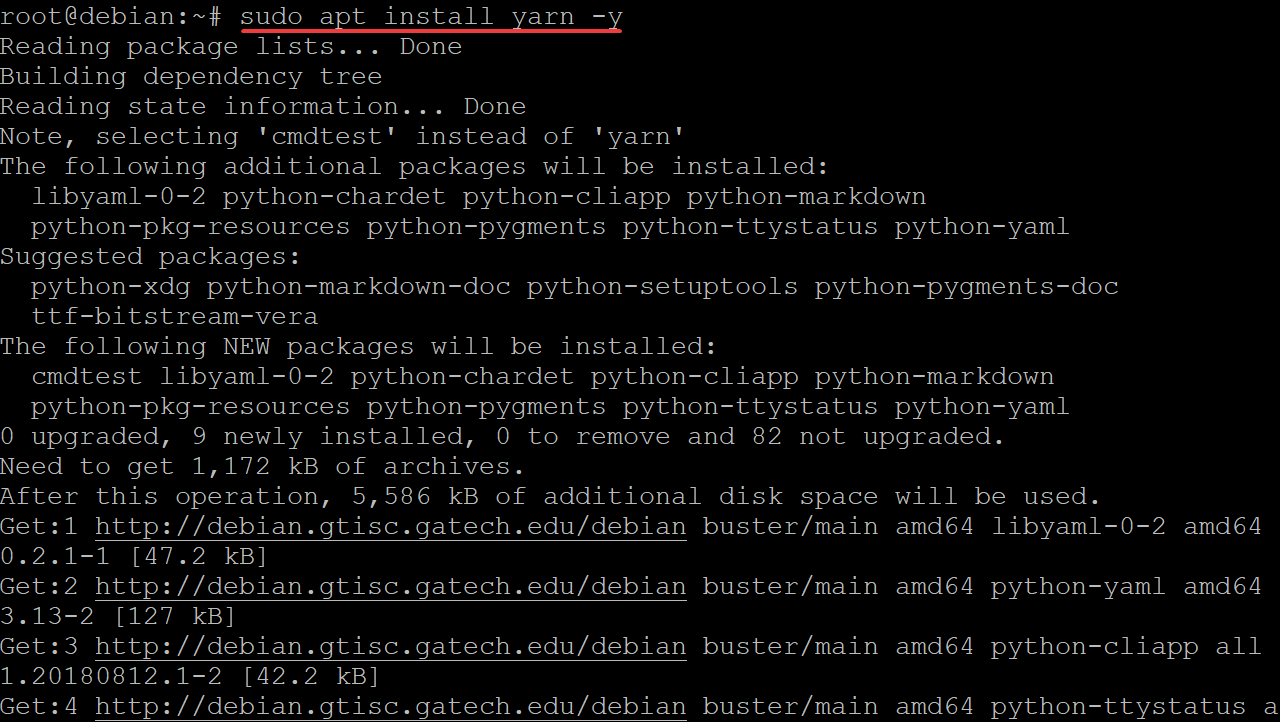
Finally, run the sudo apt install yarn to install Yarn on your server.
sudo apt install yarn -y
Sample output:
At this point, you will have Yarn installed. You can confirm it by running the yarn --version command to check the installed version of Yarn.
yarn --version
Sample output:

Testing the Installation
Now that you have Yarn installed, you probably want to try it out. In this demo, you will create a basic yarn-demo project using Yarn. You will initialize the project, install dependencies, and finally remove the dependencies to test your installation to make sure everything is working correctly,
Run the mkdir command below to create a new directory called yarn-demo in the current directory then cd into that directory. You should create a new directory and cd into it to not pollute the directory we are currently in with files you don’t want.
mkdir yarn-demo && cd yarn-demo
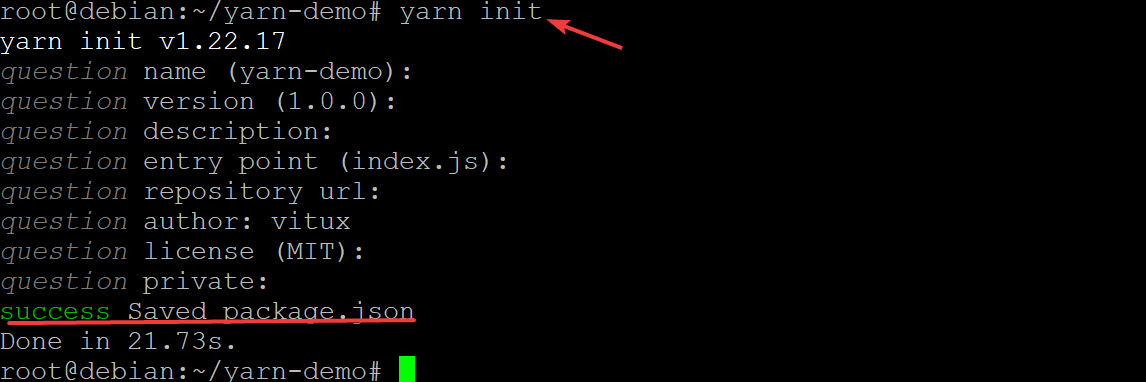
2.Once you have moved the yarn-demo directory, initialize your project by running the yarn init command below. yarn init is a scaffolding tool to generate skeleton projects from Yeoman. It’s created by the Javascript Foundation and ían open-source project hosted at GitHub.
yarn init
Provide your information as the command runs. Your information will be used to initialize your project with a package.json file, as shown below. The package.json file is a standard JSON file that contains metadata about your project. It is read by the Yarn and NPM package managers when they create or update a project’s dependencies. You can specify the version of a project, its name, its author, and any number of other metadata fields.
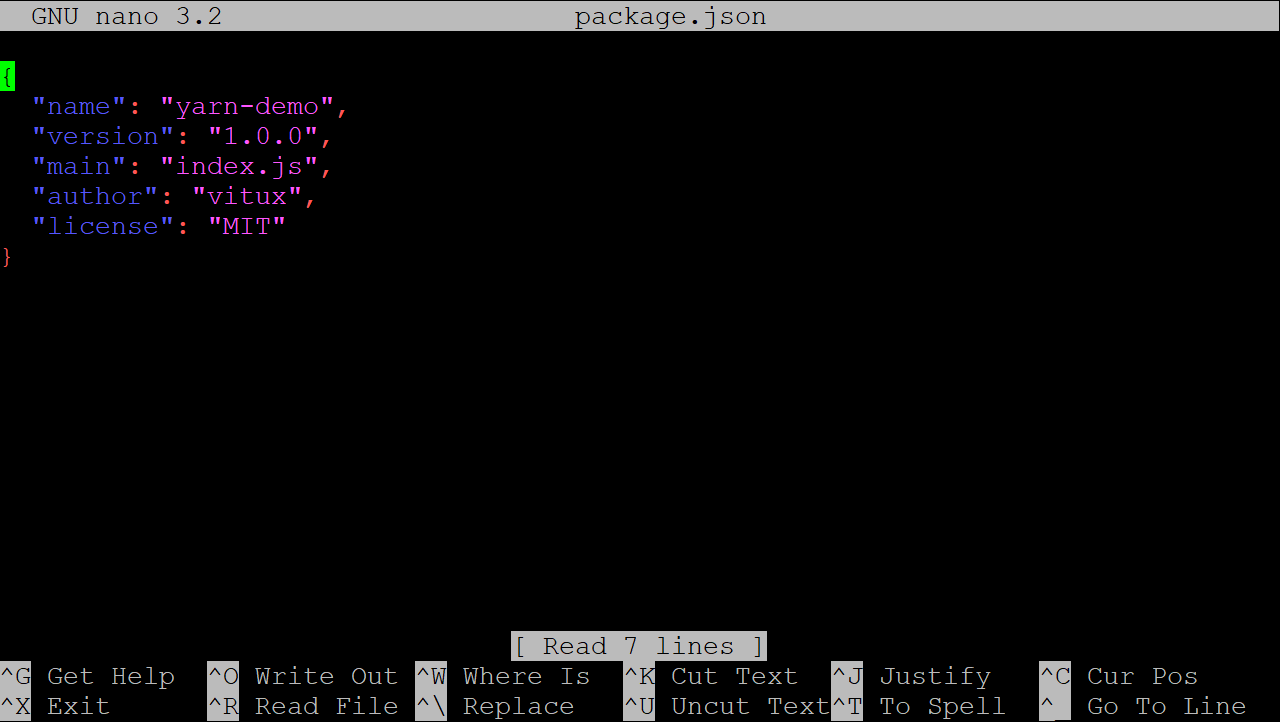
Open the package.json file that was created by the yarn init command.
sudo nano package.json
You should see a file that looks like this:
To add a new package/dependency to your project, use the syntax below. Replace [package_name] with the name of the package you wish to add.
yarn add [package_name]
For example, to add the React package to your project, run the command below. React is a Javascript library created by Facebook for building web interfaces.
yarn add react
You will get the following output.

The command above will add the necessary dependencies to your package.json file for React. Open the package.json file again to see the dependency added to your project, as shown below.
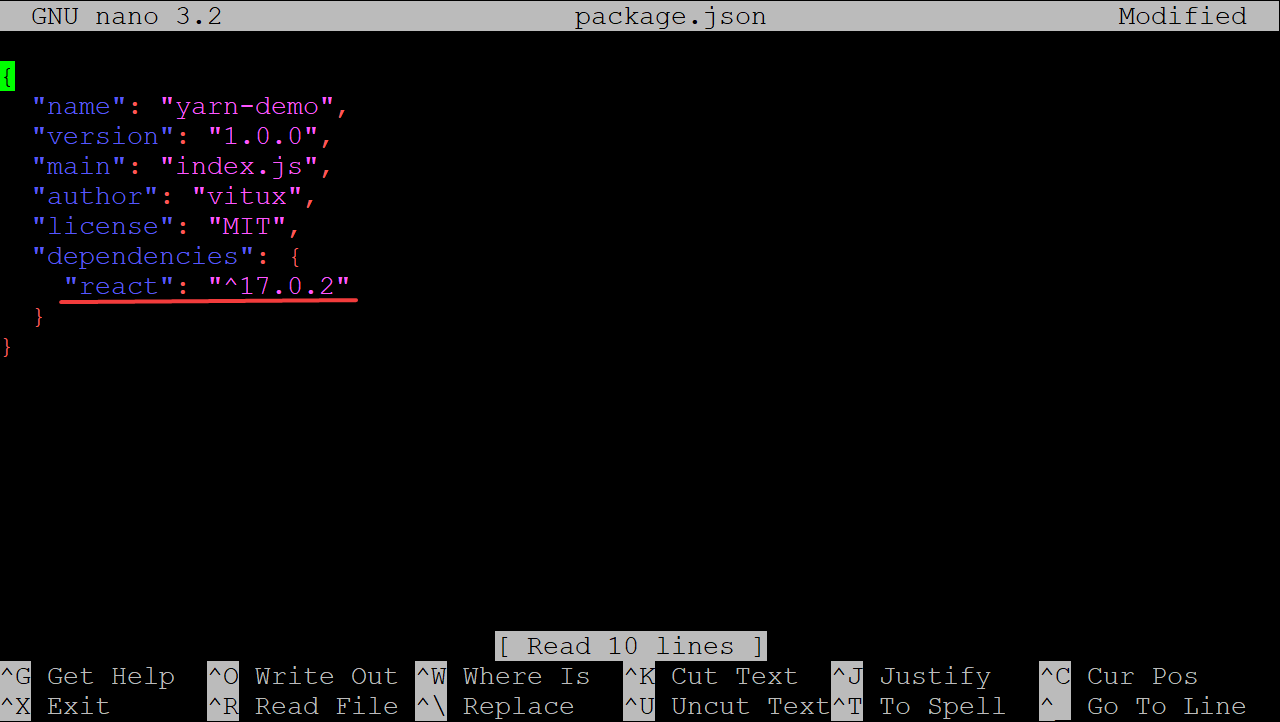
To add a specific package version, use the “@” character in front of your version number like shown below. Yarn will install the latest version by default if no version number is specified.
yarn add [package_name]@[version_or_tag]
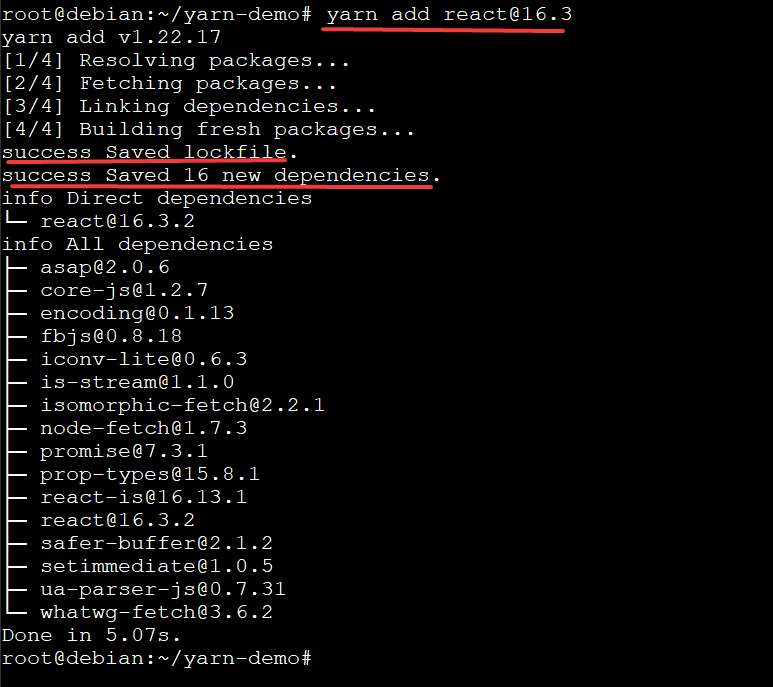
For example, run the command below to add React 16.3 as a package dependency with the yarn command.
yarn add react@16.3
You will get the following output.
To remove a package, use the syntax below.
yarn remove [package_name]
For example, run the command below to remove React from your project.
yarn remove react
You will get the following output.

Conclusion
Yarn is a JavaScript package manager that Facebook has developed. It allows you to manage your JavaScript, CSS and HTML files using a single command line tool. There is no need to download multiple packages, nor do you need to rely on different package managers for each one of your projects.
In this tutorial, you learned about how to install Yarn on your Debian Linux server. You also learned how to use the most common-used yarn command to add and remove dependencies of your projects.
With the help of this tutorial, you should be able to install Yarn on your Debian Linux and use it for managing JavaScript packages for your applications.
Thanks for taking the time to read this tutorial! If you have any questions or feedback, please feel free to comment below. Please visit our blog for more in-depth tutorials, guides, and how-tos.